
Create a Member Map
Learn how to create and configure a member map.
Access requirements
Profiles: Basic Model Developer
Custom profile with these capabilities: Model (Write, Simple)
Reach out to your administrator for access.
Overview
Member maps unify data from multiple dimensions to create equivalent values among different analytic objects. To modify the structure of a member map, such as its key dimension and linked dimensions, you can customize the member map. Customization is done before configuration because it defines the member map's schema. After you define the member map's associated dimensions, you can then configure the members for the key dimension and linked dimensions.
Create a member map
- In a project, on the navigation bar, click Model > Dimensions.
- Click Create Dimension.
- Selected Member map, and then click Next.
- Type a display name and description.
- When finished, click Create.
Result: The dimension is created and can now be customized and configured.
Customize a member map
Define the structure of your member map by choosing a key dimension and adding linked dimensions.
-
In a project, on the navigation bar, click Model > Dimensions.
- Select a member map.
-
Navigate to Customize.
- Set the key dimension. For more information, see Choose a key dimension.
- Add linked dimensions. For more information, see Add linked dimensions.
- Change the settings. For more information, see Member map settings.
Choose a key dimension
A key dimension sets the structure for the linked dimensions.
This means that if the key dimension has only three levels, any linked dimension will follow that structure of three levels regardless of the dimension's typical number of levels. The key dimension also provides the display labels.
There are two types of key dimensions: reference and custom.
Use a reference key dimension
A reference key dimension uses an existing dimension to drive the structure and member labels of the member map. Any changes made to the key dimension are only reflected in the member map, not in the reference dimension itself.
-
In a project, on the navigation bar, click Model > Dimensions.
- Select a member map.
-
Navigate to Customize.
- Under Key dimension type, select Reference.
- To choose the reference dimension, click Select Key Dimension.
- Select a subject and one of its dimensions from the list.
- Click Select.
Example: Member map location dimensions for two analytic objects
Let's say that there are different location dimensions: Employee Location and Candidate Location. Employee Location has four levels: Region, Country, State, and City. Candidate Location has five levels, with Street Address as the last level and using Province in place of State.
If we set Employee Location as the reference key dimension, all the linked dimensions (in this example, Candidate Location) map those same four levels, meaning Street Address is dropped. The display label comes from the key dimension, so State appears instead of Province.
Use a custom key dimension
A custom key dimension manually defines the levels and members of the member map. Use this key dimension type to retain all dimension members without them defaulting to "Unknown".
-
In a project, on the navigation bar, click Model > Dimensions.
- Select a member map.
-
Navigate to Customize.
- Under Key dimension type, select Custom.
- To define the levels of the key dimension, click Add Level.
- Add all the required key dimension levels before adding linked dimensions. For more information, see Add linked dimensions.
Example: Mapping functions from multiple source systems
If your data is from source systems with different function names, you can map equivalent members by creating a custom key dimension. If one source system defines a function as Sales Worker and another source system defines the same function as Sales Representative, use a custom key dimension to link these to the same member. Custom key dimensions are used when the sets of members don't overlap.
Add linked dimensions
Select the dimensions that will be linked together.
-
In a project, on the navigation bar, click Model > Dimensions.
- Select a member map.
-
Navigate to Customize.
- To link dimensions to the key dimension, click Link Dimension.
- Select a subject and one of its dimensions from the list.
- Click Link.
Repeat this step until all the required dimensions are linked.
Example: Let's say that you want to unify gender among your employee and engagement subjects so that you can analyze engagement data with employee gender data. In the member map, in Customize, you can link the Employee subject and its Gender dimension and then link the Engagement subject and its Gender dimension.
Tip: To delete a linked dimension, hover over the column and click Delete.
Map dimension levels
If the dimension has more than one level, map the associated levels.
- Click a level and select a member from the list.
Repeat this step until all the required levels are mapped.
- To clear a level selection, hover over the row and select Unmapped from the list.
Example: Let's say you linked two Location dimensions in your member map. Location has many levels, so you must map each location level (such as region, country, state, and city).
Member map settings
You can change the behavior of your member map through its settings.
To access these member map settings:
-
In a project, on the navigation bar, click Model > Dimensions.
- Select a member map.
-
Navigate to Customize.
Note: These settings are only applicable to reference key dimensions. For more information, see Choose a key dimension.
Runtime mapping toggle
Sometimes, mapped dimensions contain members that are the exact same. For example, both your key dimension and linked dimension have members called "Sales Representative".
Use this toggle to dynamically create mappings at runtime for members with the exact same member ID without manual mapping. This increases accuracy during analysis if administrators have not yet manually checked new members.
The following table describes the types of dimensions this toggle applies to and what qualifies as an "exact member" for dynamic mapping.
| Dimension type | Exact member qualifier |
|---|---|
| Level | Same member ID at each level |
| Parent-child | Same member ID |
Inherit mapping toggle
If a member isn't mapped, this toggle causes it to inherit an ancestor's mapping. Inherit mapping is informed by mapped and unmapped members in the key dimension.
If the key dimension is mapped to a member that has no data, it'll still show N/A rather than trying to find a better cell.
This toggle is helpful when there are many members of the key hierarchy mapped to the same member. For example, if you want to map all organizations under Sales to the same industry. It's also helpful when a linked leveled dimension has a different number of levels than the key dimension. For example, if the key dimension is more granular than the linked benchmark dimension.
Configure a member map
Map dimension members for the key dimension and linked dimensions. Member maps create a link between members with different names that you want to be equal, such as Non-Permanent and Contingent contract types. You can map members automatically or manually.
To configure a member map:
-
In a project, on the navigation bar, click Model > Dimensions.
- Select a member map.
- Navigate to Configure.
Tip: Click Refresh to see the most up-to-date information.
The Refresh button updates the member map to include or exclude any members that were added or removed between data versions. For example, if you added a new dimension member since the last data version, you would have to first click Refresh to map that member.
Additionally, Refresh will map members that contain an exact string match. This is different from Automap, explained below, which uses more complex string matching methods to map members.
Automap members
Use automated string matching to map linked dimension members to key dimension members.
Note:
- Use the automap feature first, before manually configuring, to prevent overwriting manual bindings.
- Automap is only available when the key dimension is a single-level leveled dimension or a Visier Benchmark.
- Click Automap.
Warning: Automap overwrites existing manual bindings.
Manually map members
Map individual dimension members by manual selection.
- Click an unmapped member in a Linked Dimension column.
- Select the applicable member most similar to the key dimension member.
- Click Done.
Troubleshoot "Data is not available"
You may see a "Data is not available" note in the Customize tab. To investigate data availability, check:
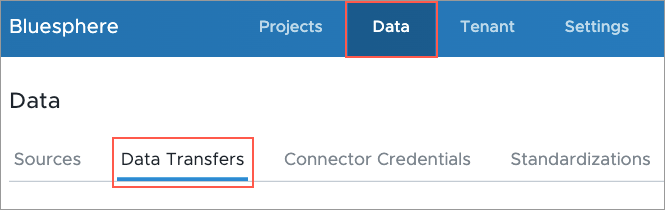
- The Data Transfers room in the global workspace. There must be a data file that contains data for the object.
- The Sources room in the global workspace. The data file containing your object data must be connected to a source. For more information, see Sources.
- The Mappings room in a project. The source that contains your object data must be mapped to the associated property. For more information, see Mappings.
- The data version. After mapping your source data to a property in Visier, you must generate a new data version. For more information, see Data Categories and Run a Job.
Validate a dimension
Access requirements
Profiles: Basic Model Developer
Custom profile with these capabilities: Model (Read, Simple)
Data required: Access to data you're validating
Reach out to your administrator for access.
Previewing your dimension allows you to quickly look at your dimension as a visual to determine whether its components are configured correctly. To preview your new dimension, its associated analytic object must have a default metric. For more information, see Default metric.
-
In a project, on the navigation bar, click Model > Dimensions.
- Select a dimension.
- In the upper-right corner, click Preview.
Publish your changes
When finished configuring and customizing the dimension, publish the project to production. For more information, see Publish Project Changes.
To see your changes, run a data version in production or wait until your next scheduled data load to make the data available to users. For more information, see Data Versions.